
My dear friend Anthony was celebrating his birthday over the weekend. He had requested I make him a rainbow cake for his party. I eagerly agreed, wanting to grant my friend his wish. hen, I realized what an undertaking this would be with my baking experience and thought that this could potentially end in a disaster.

To prevent a catastrophe, I took a few steps to prepare myself. I bought some new kitchen tools, including a rotating cake decorating stand, cake boards, a cake spatula, an icing smoother, and a cake leveler. So, maybe I was just using this cake as an excuse to upgrade my baking tools and in turn my baking skills, but I knew they’d be necessary to make this cake into a masterpiece.
The second thing I did to prepare was reading up on how to make a successful six-layer rainbow cake. I read blog posts, watched videos, and even got decorating inspiration from Pinterest. I went with the six color pride flag rainbow instead of the seven color rainbow. It seemed more fitting for the occasion. Plus, I didn’t think it’d be easy to differentiate between violet and indigo in a cake. I came to the conclusion that I could handle making this cake even if it was going to be a big challenge. I was actually really excited about it.
I must have looked at 10 recipes before I came to this one from The Baker Upstairs. It was a bit of a Goldilocks moment where some of the cakes were too big and others too small. The one I settled with seemed just right for the what I needed. I hope Anthony is not offended that I chose a cake that was made for a three year old’s birthday. I’m sure he’ll appreciate the youthful vibe.
I already had a set of Wilton gel food colors, which included every color I’d need to make this cake. I also bought a large bottle of rainbow nonpareils sprinkles and some rainbow unicorn lollipops for decoration. I must have been channeling a sixth sense, because Anthony had bought unicorn plates and straws for the party.
Fortunately, this project was made so much better by presence of my new KitchenAid mixer my parents got me for Christmas. The timing could not have been better. Could I have accomplished this with my hand mixer? Sure, but it was so much easier with the standing mixer. It is nice to regain use of your hands while the mixer is doing its job. I think I am really going to enjoy my new kitchen toy.
The making of the cake itself was fairly simple. After mixing a big ole bowl of batter, I split it evenly into six bowls. Then came the messy part. I am a messy baker/cook to begin with, but when food dye is involved, I end up looking like a five year old after dying Easter eggs. The t-shirt I was wearing this day is great proof.
I mixed two colors at a time. I only have two round cake pans, so I had to make the cake in three rounds. This was actually better because it allowed for a more even baking. I used parchment paper for easy removal from the pan. Then, I could get right to making the next two cakes.
Once all six cakes were baked and cooled, I started to think about assembly. I went with the first notch on the cake leveler to make sure that each cake was a good height. Using the cake leveler was a game changer. Some people will just use a knife to level off the cake, but the results can be uneven. With this leveler, each layer was exactly the same height. I also used the first cake as a stencil to cut the sides of each cake so that they would all be the same size all the way around.
Now that I had six even cakes, it was time to assemble. First, I whipped up my frosting. I made a bit extra than the recipe calls for because I had a plan which would require extra frosting. Using the mixer with the whisk attachment was a dream come true. My buttercream whipped up so fast I almost didn’t believe it. I seriously love my parents for giving me this game-changing gift.
I took one of my 12 inch cake boards and cut it to an appropriate size for my cake box. I found these convenient cake boxes that made this finished product look like something I picked up from a bakery. I placed the cake board on my handy rotating cake decorating stand. As is always the best idea when assembling a decorating a cake, I spread a little bit of frosting on the cake board and placed the first cake (the violet one) cut side up. I took a scoop of icing and made a crumb coat on top, followed by placing it in the freezer for a few minutes to set. I then put a coat of of frosting on top and smoothed it out with my cake spatula. I repeated this step five times with the other cakes.

At this point I had cake that grew significantly in height and weight. It was now time to give this cake a complete crumb coat on the top and on the sides. I then stuck it back in the freezer. Now here comes the big part: giving the cake a frosting coat that doesn’t show crumbs and is evenly spread across all parts of the cake. It was a bit of a challenge, as I kept getting gaps where the red wanted pop out on the top edge. I just kept using my cake spatula to smooth everything out. It wasn’t perfect, but I did the best I could.

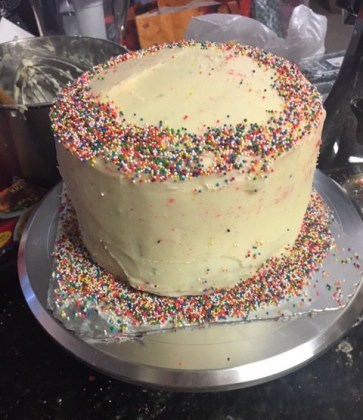
To decorate, I made a layer of sprinkles on the bottom of the cake. I intended to spread them up the side a bit, but I kind of liked the ring around the bottom. I also made a ring of sprinkles around the top. At this point, I had a fully decorated cake (minus the unicorns). I put it in the freezer to set while I got ready for the party. It was definitely the heaviest cake I have ever made, but also the prettiest.
It was now about 4:00 pm. I ate breakfast at 8:00 am when I woke up, but I had been working on this cake since about 9:30 am. I got so immersed in the cake that I forgot to eat. I finally sat down and had a very late lunch and finally took the chance to relax before heading to the party.


We put the cake in the fridge as I arrived, but not until I let everyone rave about how beautiful it looked. All this cake needed was the unicorn lollipops to match the plates.

I must admit. I was a little terrified for this big reveal. Sure, everyone marveled over the cake was as I arrived, but I was so nervous to see what it looked like inside. I wanted it to live up to the reputation I built for this cake. We sang “Happy Birthday” to Anthony, and the moment of anticipation finally arrived.

I so wish I could have seen the look on my face when they cut a few pieces and revealed the inside. I was both shocked and thrilled. I really could not believe that I did it. I made this cake, and it marvelous. The layers were perfect. Even the frosting on each layer was even. I don’t think I have ever been so proud of myself, including when I made six types of handmade pasta for 20 people. I consider myself a decent baker. I can follow a recipe. I can make basic cakes and cookies, but I have never made a cake of this magnitude before. I certainly never made a cake this pretty either. This cake even seemed to top all of my others in terms of taste. The cake was soft and moist, and the buttercream brought it all together. It wasn’t too sweet and had a subtle vanilla flavor.


While I was shocked at how good this cake turned out, it has given me confidence to consider myself more than just an okay baker. I want to keep challenging myself to become a better baker. If anyone has any fun ideas for me to try, hit me up! I am always up for a challenge.
What made me even happier was how much everyone loved the cake. This work of art was absolutely devoured. There was nothing left at the end but crumbs, a pile of rainbow sprinkles, and a lonely unicorn. Most importantly, Anthony loved his cake. I did all this to challenge myself, but ultimately, I just wanted him to have exactly what he wanted. Anthony is a very good friend to me. He has supported me through some tough times in the past few years. I value his friendship more than he may know, so I wanted to do something to show him that. I am so glad that I was able to present him the cake that he deserved.


If you are wondering if I just threw all those cake scraps away, the answer is absolutely not. I am not about to waste some perfectly good cake.
I took those cake scraps and turned them into gorgeous cake pops. This transformation from cake scraps to a whole new dessert required very little extra ingredients. I already had the cake and sprinkles, and I made extra frosting for this very purpose. The only extra ingredient I needed was white chocolate, which I happened to have in my cabinet. I had bought this bag of white chocolate melts for Christmas cookies, but for some reason, I ended up not needing them.
This is not to say that I made them completely without spending any extra money. I may have used this as another excuse to buy some fun things. I got myself some various colored cake pop sticks. These were sold in bulk, so I guess I now have to keep making cake pops. I also bought this cake pop stand that holds 24 cake pops. It is so cute and looks like a cake pop carousel.

I made these cake pops on Saturday while my kitchen was already in disarray from all the baking. When I had leveled all the cakes, I put the scraps in six different bowls to separate the colors. I crumbled the cakes in the bowls, and added a small scoop of frosting to each bowl. With my hand, I incorporated the frosting into the cake crumbs until it formed more or less a large cake ball. You don’t want it to be dry and crumby, but you don’t want it to be too moist or it won’t hold well when you make the cake balls.
Now for the time-consuming but rather fun part. I took a piece of saran wrap and laid it on the counter. Then, I took a little chunk of each color cake (one at a time starting with violet and ending with red) and flattened it on my hand and then stacked the layers on the saran wrap. Closing the saran wrap over the cake with my hands, I formed the cake layers into a ball. The balls were a too big, but I took some off of the sides to form new balls that were more of a tie-dye pattern. Once all the balls were formed, I stuck the tray of cake pops in the freezer to harden for about 45 minutes to an hour.
For the final part, I took out my white chocolate and melted it over a double boiler. Once melted, I took each stick and dipped the very top into the chocolate and then pressed it into the bottom of the cake pop (the violet layer). This allowed the stick to stay in place better. I did all the sticks one by one, and I let them sit there fore a few minutes. Then, I took each cake pop and carefully dipped them into the bowl of melted chocolate, making sure that they were covered on the top and sides. I flipped them cake side up and allowed any excess chocolate to drip back into the bowl followed by showering rainbow sprinkles over top. I put them in the cake pop stand while the chocolate hardened.
I was not bringing these to the party, since I thought that would be overkill. Instead, I decided to bring them to work to share with my co-workers. I popped the cake pops into a container and kept them in the freezer for a few days before I took them to work.
My co-workers sure seemed to appreciate the gesture. Like many sweets that appear in the office, they disappeared rapidly. Everyone I talked to said they were delicious and fun. They really were quite adorable. Most of them had a defined rainbow pattern. I think I nailed it on this part, as well.

So, there you have it. This is my diary narrative for my fun baking adventure. With one entire day of baking, I made two awesome desserts that pleased two crowds. I am beyond excited that the cake turned out so well in taste and presentation. This project took a lot out of me, but it was worth it. Yes, I do need to be better at listening to my body’s cues and respecting my physical needs. Balance has always been hard for me. I will call this a huge success though. I am ever so pleased that my friend trusted me with such a responsibility.

What a fun cake!
LikeLiked by 1 person